
How to Change a Car Tire Safely: Tools, Jack Points, Lug-Nut Order, and Spare-Tire Limits
Changing a car tire safely is important for your safety and vehicle performance. You need the right tools, such as a lug wrench, a reliable jack, and a properly inflated spare tire. Knowing the correct jack points on your car helps prevent damage when lifting the vehicle.
Before lifting the car, secure it with wheel wedges and engage the parking brake. Loosen the lug nuts slightly while the car is still on the ground.
After lifting the vehicle with the jack, fully remove the lug nuts and install the spare tire. Tighten the nuts in a crisscross or star pattern to ensure even pressure.
Remember that spare tires have limits on speed and distance. Regularly inspect your spare to avoid issues during emergencies.
Following these steps and precautions will help you change your tire safely and efficiently.
Essential Tools You Need to Change a Tire Safely
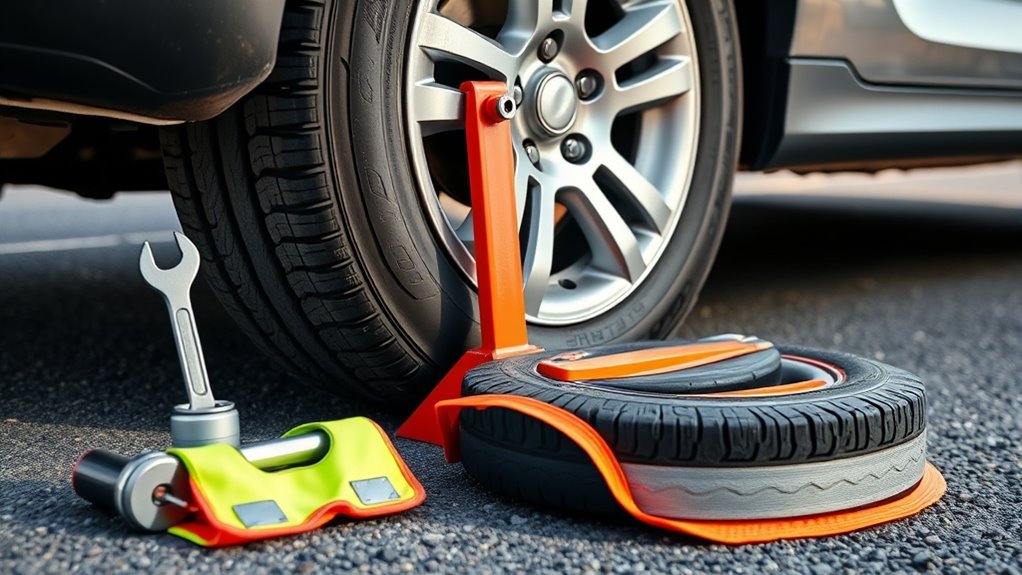
Changing a tire safely requires specific tools to ensure the job is done efficiently and without risk. Essential tools include a lug wrench, a spare tire, a jack, wheel wedges, gloves, and a flashlight.
Changing a tire safely needs the right tools to work efficiently and minimize risk.
A lug wrench loosens and tightens lug nuts. This tool fits the nuts on your wheel and provides the leverage needed to remove them. Without a lug wrench, removing lug nuts is difficult.
A fully inflated spare tire replaces the flat tire. Check its pressure before use to avoid further issues on the road. A spare tire must be ready to support your vehicle safely.
A reliable jack lifts the vehicle off the ground. Choose a jack compatible with your vehicle’s weight and follow the manufacturer’s instructions to avoid accidents.
Wheel wedges or blocks prevent the vehicle from rolling while lifted. Place them on the wheels opposite the flat tire to secure the car.
Gloves protect your hands from dirt and injury during the tire change. Use durable gloves to maintain grip and avoid cuts or scrapes.
A flashlight helps when changing a tire in low light or nighttime conditions. A bright, portable light source improves visibility and safety.
Summary of essential tools for changing a tire:
- Lug wrench: loosens and tightens lug nuts
- Fully inflated spare tire: replaces the flat tire
- Reliable jack: lifts the vehicle securely
- Wheel wedges/blocks: prevent vehicle rolling
- Gloves: protect hands
- Flashlight: provides light in dark conditions
Having these tools ready reduces time and risk when changing a tire roadside.
Finding and Using the Right Jack Points on Your Car
Designated jack points are reinforced areas on a car’s frame where a jack can safely lift the vehicle. These points ensure stability and prevent damage during lifting. Typically located near the front and rear wheel wells along the rocker panels, jack points are marked or described in the owner’s manual.
Jack points carry the vehicle’s weight without bending the frame or harming components like brake lines or fuel tanks. Using improper spots risks structural damage and unsafe lifting conditions. Visual cues such as small notches or reinforced metal plates often indicate the correct jack locations.
To lift a vehicle safely:
- Consult the owner’s manual for exact jack point locations.
- Inspect the rocker panels near the front and rear wheels for reinforced areas.
- Position the jack directly under the designated points.
- Avoid placing the jack on plastic parts, pinch welds, or suspension components.
Following these steps keeps the vehicle balanced and protects its frame during tire changes or repairs.
How to Safely Lift Your Car With a Jack
Proper jack placement on designated lift points ensures a stable base to raise a vehicle safely. Place the car on a flat, firm surface with the parking brake engaged before lifting. Turn the jack handle slowly and steadily, keeping the jack vertical to prevent slipping. Never go under a car supported only by a jack. Use wheel chocks on the wheels opposite the lift side to increase stability.
Correct jack positioning follows the vehicle manufacturer’s specifications. Consult the owner’s manual to locate proper lift points. Positioning the jack incorrectly risks damage and instability during lifting.
Raise the car by turning the jack handle steadily. Sudden movements can cause the vehicle to shift or the jack to slip, creating a hazard.
Use wheel chocks to block the wheels opposite the lifted end. Chocks stop the car from rolling and improve safety during maintenance.
Never place any part of your body under a car supported solely by a jack. Use jack stands or other approved supports before working underneath the vehicle.
| Step | Action | Safety Tip |
|---|---|---|
| 1 | Position jack correctly | Consult owner’s manual for lift points |
| 2 | Raise car slowly | Turn jack handle steadily |
| 3 | Stabilize with chocks | Place chocks opposite lifting side |
Step-by-Step Guide to Loosening and Removing Lug Nuts
Loosening lug nuts requires proper technique and steady force to prevent injury and damage. Use a lug wrench to turn the nuts counterclockwise, applying pressure carefully. Do not remove the nuts completely at this stage; loosen them enough to allow wheel removal later.
Follow these steps to loosen lug nuts safely:
- Position the lug wrench firmly on a lug nut.
- Apply steady pressure, turning the nut counterclockwise.
- Use your body weight to push down on the wrench handle instead of relying only on arm strength.
- Loosen each lug nut without fully removing it.
- Maintain an even approach by loosening all nuts gradually to avoid uneven stress on the wheel.
Keeping the lug nuts partially tightened stabilizes the wheel while it is lifted. This method ensures safer and easier wheel removal.
How to Install and Remove Your Spare Tire Safely
Proper removal of the damaged tire is vital to prevent damage to the wheel and vehicle. Installing the spare tire requires careful alignment and secure fastening to guarantee safety during driving. Finally, tightening the lug nuts to the correct torque specification is essential to maintain wheel stability.
Proper Tire Removal
Proper tire removal requires stable vehicle positioning, secure loosening of lug nuts, safe lifting, and careful tire handling. Following a systematic process reduces injury risk and prevents damage to the wheel and studs.
Steps for Safe and Efficient Tire Removal:
1. Position the Vehicle
Place the vehicle on a flat, stable surface. Engage the parking brake to prevent movement during the process.
2. Loosen Lug Nuts
Slightly loosen the lug nuts before lifting the car. Use a wrench to turn them counterclockwise without removing them completely.
3. Raise the Vehicle
Use a jack at the manufacturer’s designated jack points. Lift the vehicle until the tire is off the ground and stable.
4. Remove Lug Nuts
Fully remove the lug nuts in a star pattern. This method distributes pressure evenly and prevents wheel damage.
5. Remove the Tire
Pull the tire straight off the hub. Avoid twisting or pulling at an angle to protect the wheel studs.
6. Store the Tire Safely
Place the removed tire in a safe area away from walkways to avoid tripping hazards.
7. Avoid Injury
Keep fingers clear of gaps between the tire and vehicle during removal to prevent pinching or crushing injuries.
Following these steps ensures a safe, efficient tire removal process with minimal risk of injury or damage.
Safe Spare Installation
Installing a spare tire safely requires correct alignment, secure fastening, and vehicle stability. Follow specific steps to avoid damage and ensure the tire holds firmly during driving.
Align the spare tire with the wheel studs so it fits flush against the hub. Do not force the tire onto the studs, as this can bend or damage the studs and the tire.
Hand-thread the lug nuts onto the studs to prevent cross-threading. Tighten the lug nuts evenly using a crisscross pattern. This method applies balanced pressure, securing the tire and reducing wobble.
When removing the spare tire, loosen the lug nuts in the same crisscross pattern before fully taking off the tire. This preserves the studs and ensures safe removal.
Never place any part of your body under the vehicle during installation or removal. Confirm the car is stable on the jack or firmly resting on the ground before beginning work.
Step-by-step spare tire installation:
- Park the vehicle on a flat, stable surface and apply the parking brake.
- Loosen the lug nuts slightly before lifting the car.
- Use a jack to raise the vehicle until the flat tire is off the ground.
- Remove the lug nuts completely and take off the flat tire.
- Align the spare tire with the wheel studs.
- Hand-thread lug nuts onto the studs.
- Tighten lug nuts in a crisscross pattern with a wrench.
- Lower the vehicle carefully.
- Finalize tightening the lug nuts in the crisscross pattern.
- Store tools and flat tire securely.
Following these steps ensures the spare tire is installed safely and functions properly until a permanent tire can be fitted.
Torque Lug Nuts
Torque specifications for lug nuts ensure a spare tire is securely fastened and can be removed safely. Correct torque prevents damage to the wheel, maintains vehicle safety, and stops lug nuts from loosening over time.
Proper installation requires tightening lug nuts in a star or crisscross pattern. This method distributes pressure evenly across the wheel. Use a calibrated torque wrench to apply the exact torque recommended by the vehicle manufacturer. When loosening lug nuts, slightly loosen them before lifting the vehicle to prevent the wheel from spinning.
Lug Nut Torque Steps and Recommendations
| Step | Action | Recommended Torque (ft-lbs) |
|---|---|---|
| 1 | Hand-tighten lug nuts | N/A |
| 2 | Tighten in star pattern | 80-100 (typical range) |
| 3 | Final torque check | Follow manufacturer specifications |
Following these steps helps maintain safety and ensures ease of tire changes. Always refer to the vehicle’s manual for exact torque values to avoid under-tightening or over-tightening.
How to Tighten Lug Nuts the Right Way
Tightening lug nuts requires following a specific pattern to guarantee even pressure across the wheel. Applying the correct torque is essential to secure the tire without causing damage. These steps help maintain safety and wheel integrity after installation.
Proper Lug Nut Pattern
Proper lug nut tightening uses a star or crisscross pattern to ensure even pressure and prevent wheel damage. This method helps the wheel seat evenly on the hub, reducing the risk of warping or misalignment.
Lug nuts should not be tightened sequentially around the wheel. Instead, follow a specific order based on the number of lug nuts to maintain balance.
Lug nut tightening patterns:
- 4 lug nuts: Tighten opposite nuts in a crisscross pattern (1-3-2-4).
- 5 lug nuts: Tighten in a star pattern: 1-3-5-2-4.
- 6 lug nuts: Tighten in a crisscross sequence: 1-4-2-5-3-6.
Example table for a 9-lug pattern (for reference):
| Lug Nut 1 | Lug Nut 3 | Lug Nut 5 |
|---|---|---|
| Lug Nut 4 | Lug Nut 2 | Lug Nut 6 |
| Lug Nut 7 | Lug Nut 9 | Lug Nut 8 |
Follow the recommended pattern before applying final torque. This process ensures the wheel is secured safely and evenly.
Correct Torque Application
Correct torque application means tightening lug nuts with the exact force needed to secure the wheel without causing damage. Proper torque prevents brake rotor warping, thread stripping, and wheel loosening during driving.
Applying the right torque involves these key steps:
- Use a calibrated torque wrench to ensure precise force measurement.
- Follow the vehicle manufacturer’s recommended torque range, usually 80-100 ft-lbs.
- Tighten lug nuts in a star or crisscross pattern to distribute pressure evenly.
- Recheck torque after driving 25-50 miles to compensate for settling.
Over-tightening can damage brake rotors and strip threads. Under-tightening risks the wheel loosening, which compromises safety. Following these steps ensures secure fastening and protects wheel components.
Spare Tire Limits and When to Replace Them
A spare tire should be replaced based on its age, condition, and usage limits. Compact spares are for temporary use, with speed limits around 50 mph and distance limits between 50 to 70 miles. Tires degrade over time and need replacement every 6 to 10 years, regardless of use.
Compact spare tires, often called “donuts,” are designed for short-term emergencies. They have strict limits, including:
- Maximum speed: about 50 mph (80 km/h)
- Maximum distance: 50 to 70 miles (80 to 112 km)
- Use beyond these limits can risk tire failure and vehicle control
Spare tires degrade even when unused. Rubber hardens, cracks, or develops dry rot over time. Manufacturers recommend replacement every 6 to 10 years, regardless of tread wear. Regular inspections should check for:
- Cracks or cuts in the sidewall
- Dry rot or brittle rubber
- Any visible damage or deformities
Full-size spare tires have similar aging concerns but generally do not have strict speed or distance limits. They can be used like regular tires but still require periodic inspection and replacement based on age or damage.
Summary of spare tire replacement guidelines:
| Tire Type | Speed Limit | Distance Limit | Replacement Interval | Key Inspection Points |
|---|---|---|---|---|
| Compact (Donut) | ~50 mph (80 km/h) | 50-70 miles (80-112 km) | Every 6-10 years | Cracks, dry rot, sidewall damage |
| Full-size | No strict limit | No strict limit | Every 6-10 years or as needed | Same as compact plus tread condition |
Following these guidelines ensures the spare tire remains safe and reliable for emergency use until the main tire is repaired or replaced.
Common Tire-Changing Mistakes and How to Avoid Them
Proper maintenance and timely replacement of spare tires reduce failure risks during tire changes. However, common mistakes during the tire-changing process can affect safety and efficiency. Recognizing these errors helps ensure a safe and smooth tire change.
- Securing the vehicle before lifting prevents it from shifting or falling. Always engage the parking brake and place wheel chocks on the opposite side of the tire being changed.
- Positioning the jack on manufacturer-recommended lift points avoids vehicle damage. Consult the owner’s manual to find these specific locations.
- Loosening or tightening lug nuts in the correct star or crisscross pattern maintains even pressure and prevents wheel misalignment.
- Using a spare tire that is properly inflated and in good condition avoids blowouts and handling problems. Check the spare’s pressure regularly and replace it if worn.
Following these steps reduces hazards and ensures a stable, efficient tire change.
Frequently Asked Questions
How Often Should I Check My Spare Tire’s Air Pressure?
How often should I check my spare tire’s air pressure?
Check your spare tire’s air pressure at least once a month to ensure it is properly inflated and ready for emergencies. Air naturally escapes over time, so regular checks help prevent unexpected flat tire issues.
Can I Use a Tire Inflator Instead of Changing the Tire?
Can I use a tire inflator instead of changing the tire?
A tire inflator can temporarily restore air pressure for minor leaks, allowing short-distance driving to a repair shop. However, it is not a permanent fix and should not be used on tires with significant damage like large punctures or sidewall cuts. Replacing the tire or using a spare is the safest option.
What Should I Do if My Jack Slips While Lifting the Car?
If the jack slips while lifting the car, immediately lower it to avoid injury or damage. Reposition the jack securely on the designated lifting point, ensuring it is stable and on firm, level ground. Use wheel chocks and a jack stand for added stability before resuming lifting.
How Do Weather Conditions Affect Tire-Changing Safety?
How do weather conditions affect tire-changing safety?
Weather impacts tire-changing safety by reducing stability and visibility. Rain or snow create slippery surfaces, increasing the risk of jack slippage and loss of footing. Wind can cause tools or parts to shift unexpectedly. Cold temperatures may make metal parts brittle and harder to handle. Using wheel chocks, wearing gloves, and working on a stable, dry surface help reduce these risks.
Is It Safe to Drive Immediately After Changing a Tire?
Is it safe to drive immediately after changing a tire? Yes, if the lug nuts are properly tightened and the spare tire is fully inflated. Drive slowly at first to ensure stability. For temporary “donut” spares, follow speed and distance limits to prevent damage.